REST File Uploads
Uploading files in Wized is straightforward, even for beginners. This guide walks you through sending files using REST requests, such as uploading a profile image or a PDF file.
Note that there are some major differences in REST requests when including files in the Body.
Let's get started!
How to upload files using REST requests
1. Create an endpoint that accepts a file
Ensure your server has a POST, PUT or PATCH endpoint set up that accepts a file. The endpoint should be able to parse multipart/form-data requests, as that's the content type that Wized uses for file uploads.
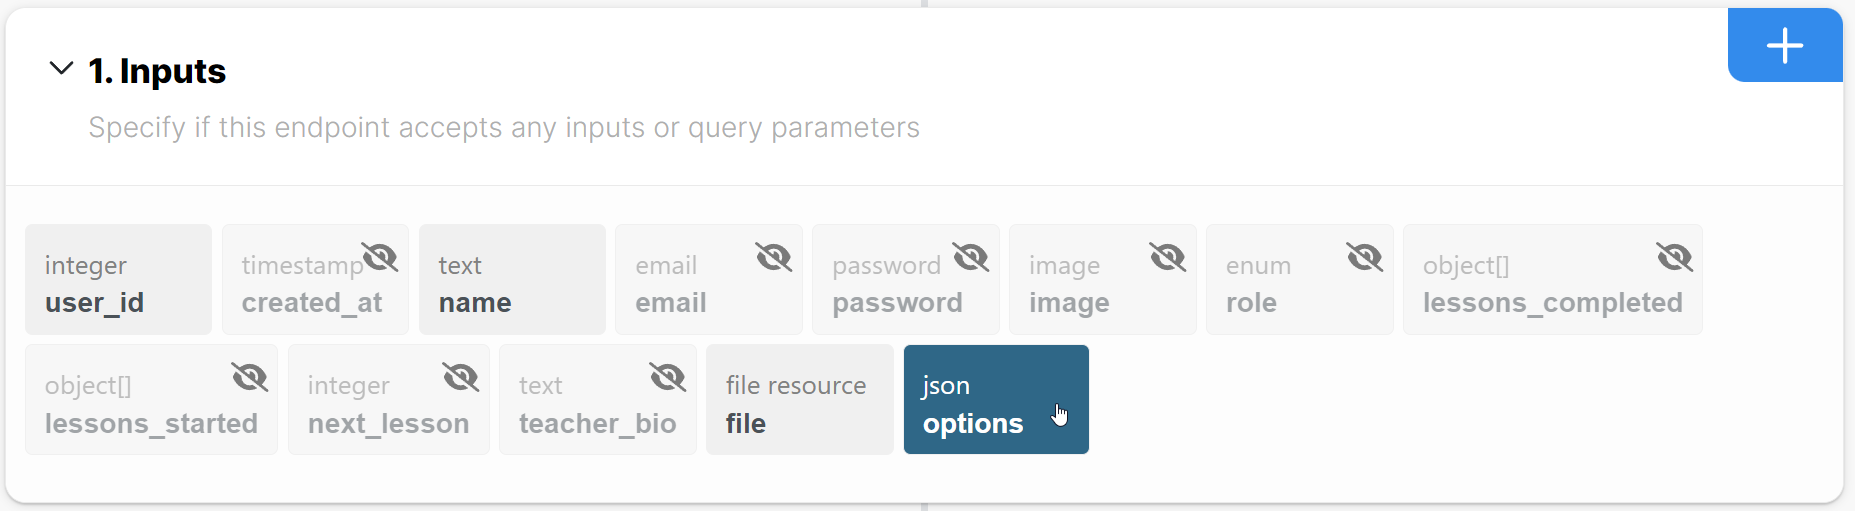
In the following example the endpoint accepts several fields, including a file:
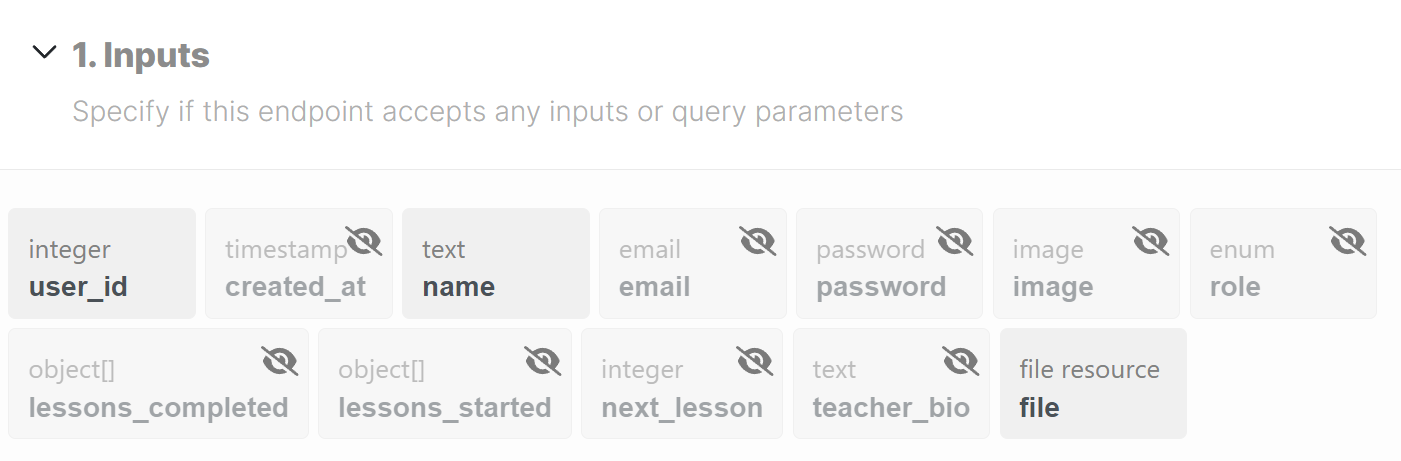
If you're using Xano, make sure to set the input type to file, and then convert the file into the desired format i.e. image.
2. Reference the form or input in Wized
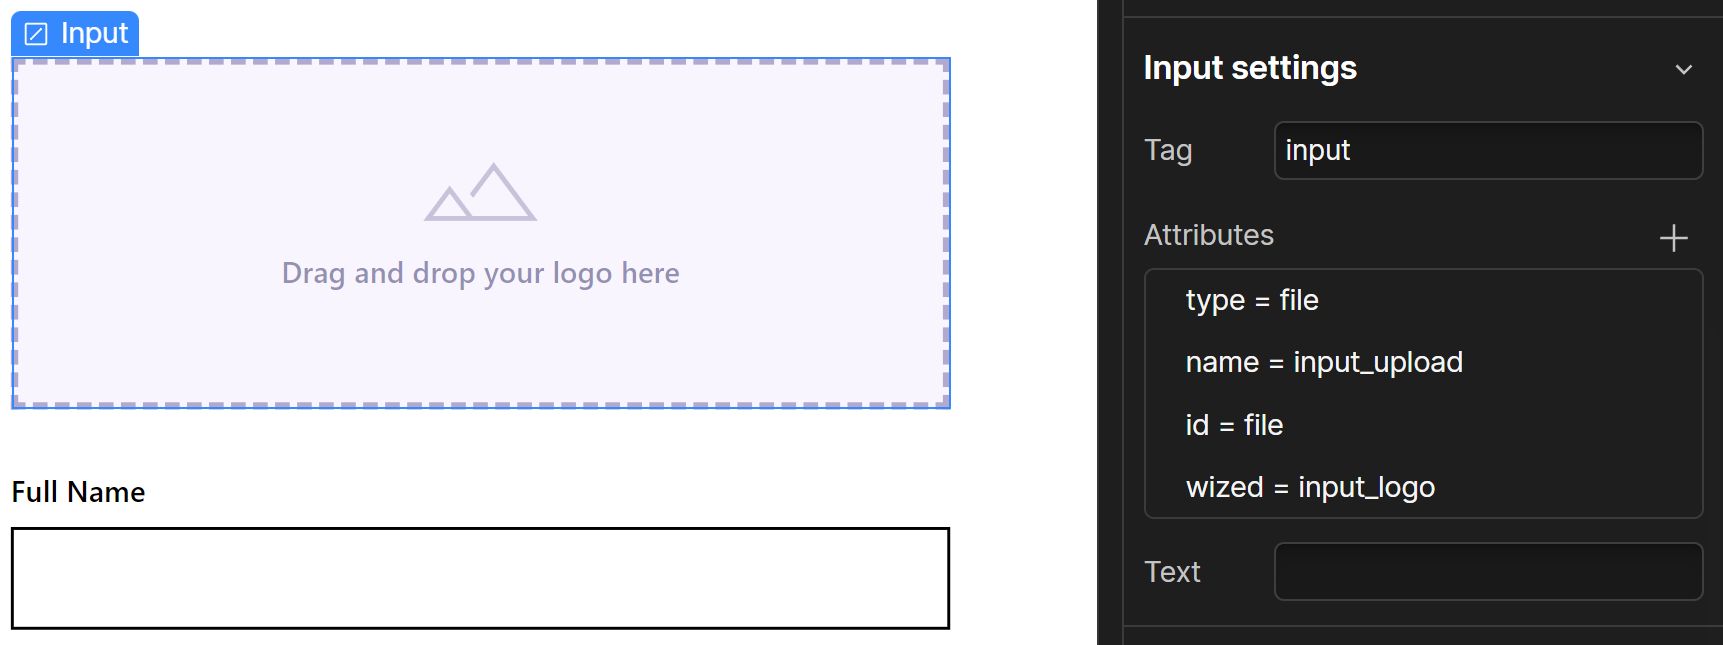
To send a file, first you need to reference a file input in Wized. You can do this by using Input Fields or Forms.
3. Include the file in a Request
All you need to do now is include the file in a request. You can do this by creating a Request in Wized, and then binding the file input to any fields in the request body:
In Wized, set up a request:
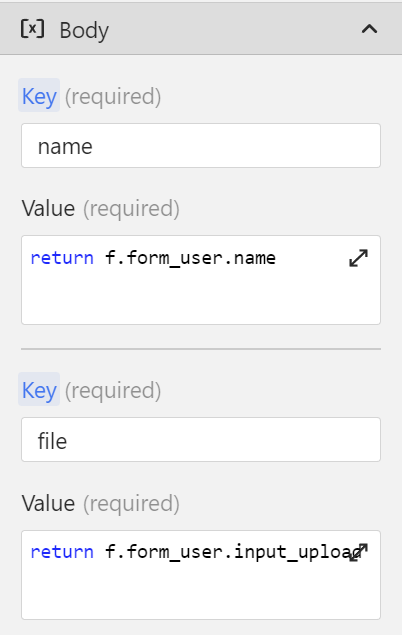
Wized will automatically recognize the file input and send the Request as multipart/form-data.
Previewing file input images
If you want to preview an image before submitting it, you will need:
- An image element that's going to display your image i.e.
wized="new_user_image" - A file input with a wized attribute i.e.
wized="input_logo"
Create your preview action
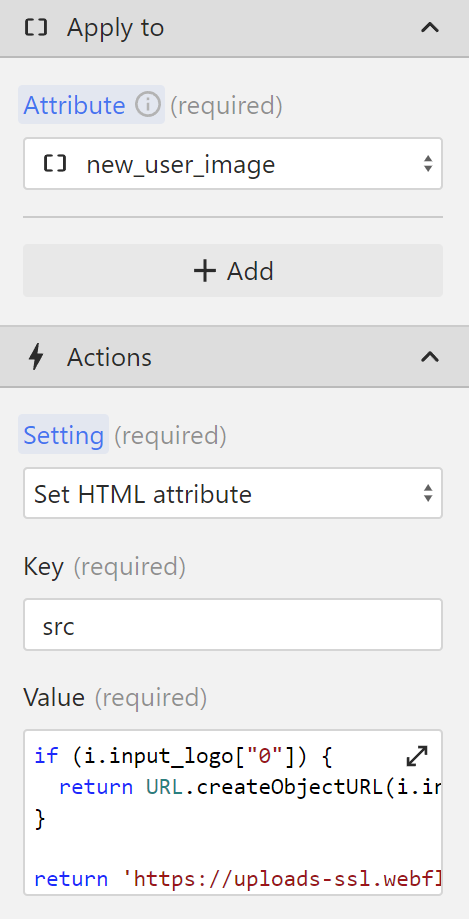
- Create a new action of type element, and set your image as the action target.
- Under Action, select Set HTML Attribute.
- Set
srcas the key. - Add the following logic in the value field:
if (i.input_logo['0']) {
  //Checks if an image is added to the input field
  return URL.createObjectURL(i.input_logo['0']); //If the image is added, create a URL out of the file, and return it
}
return 'https://example.com/placeholder-icon.svg'; //Else, if an image wasn't added to the input, display a placeholder
Differences in REST requests when including files in the Body
When your form includes a file, the Content-Type changes from application/json to multipart/form-data. This switch affects how data, such as an array of strings is parsed by the server.
Services like Xano process JSON payloads automatically, converting them into the correct format. However, when receiving multipart/form-data requests, the server doesn't automatically parse the data and treats it like a string.
In those cases, you need to make sure that the server parses the data correctly. In Xano, you can do this by defining the input as json: