Settings
Plan & Usage
In this section, you will find all relevant information about your current plan and project usage statistics.
- Current Plan Type and Upgrade: At the top, you will see the type of plan you currently have. If you wish to upgrade to a higher plan, you will find a direct link that allows you to upgrade your plan.
- Actions Used: This statistic shows the total number of actions you have created in your project. Depending on the plan type you choose, the limit of allowed actions will vary.
- Page Views This Month: Here you can see how many times your users have visited a page on your site during the month. As with actions, the page view limit will change according to your plan.
- Today: This metric shows the number of views your website has received today.
Note: In the free plan, there are no limitations on the number of views or actions, offering you the freedom to experiment and develop without restrictions. 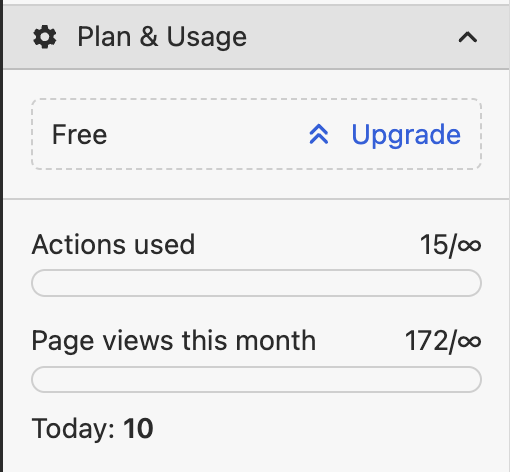
Branding
Enable or Disable the Wized Badge: You will have the option to decide whether to display the Wized badge on your website. This badge appears at the bottom corner of your page, indicating that your site uses Wized technology.
Note: If you are using the free plan, you will not be able to disable the Wized badge. To hide the badge, you will need to upgrade to one of our paid plans. 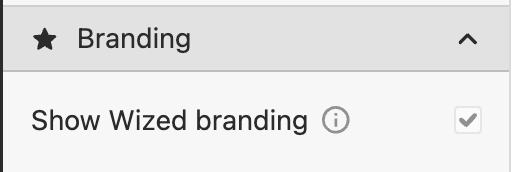
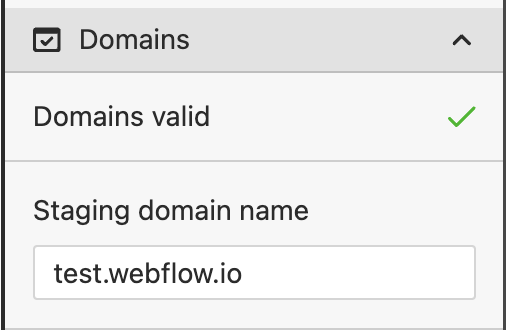
Domains
In this section, you can manage the domains associated with your project. Below are the available options:
- Staging Domain: Here you can add or change the current staging domain. The staging domain is the one you use for testing before publishing changes to production (Webflow.io).
- Production Domain: Once you have a paid plan, you can add the production domain. This is the domain where your website will be accessible to all users in its final and live version.
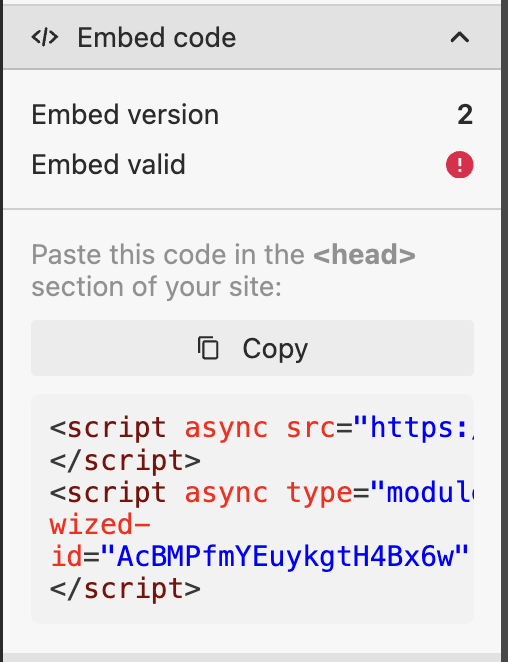
Embed code
In this section, you will find the script necessary to connect your Webflow site with Wized. Here are the details you need to consider:
- Integration Script: This is the code you need to paste into the
<head>section of your Webflow project. It is essential for establishing the connection between your website and Wized. - Embed Version: Here you will see the version of Wized you are using. The latest version is 2.
- Validation: Wized performs an automatic validation to ensure that the script is correctly integrated into your website. If the validation is successful, you will see a green icon confirming that the connection between Wized and your project is correct.
Share project
In this section, you can enable the option to share your project with other developers or clients. Here is how it works:
- Preview Link: You can generate and share a preview link of your project. The person who receives the link can open the configurator with your project and see all the information, including actions, requests, and more.
- Session Changes: Changes made by the person viewing the project through the preview link will only be reflected in that specific session and will not affect the actual project.

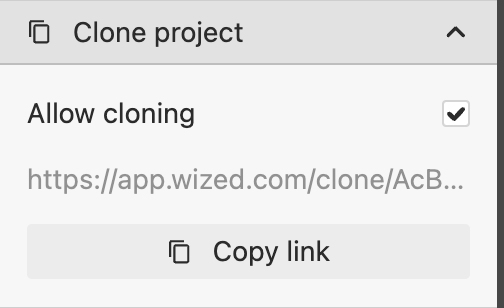
Clone project
In this section, you can enable the option to allow other users to clone your project. Here is how:
- Generate Cloning Link: You can generate a link that other users can use to clone your project. This will allow them to create an exact copy of your project in their own environment, facilitating collaboration and shared learning.