Add parameter to link
The Add parameter to link configuration allows you to add additional information to links on your website. This information is appended to the end of the URL in the form of query parameters, which are key-value pairs separated by question marks ? and ampersands &&.
For example, if you have a link to a product page with the URL https://mystore.com/product, you can add a query parameter called id with the value 12345 to indicate which specific product should be displayed: https://mystore.com/product?id=12345.
How does it work?
- URL destination: In Webflow, set the url or destination page to which you want the user to be redirected once clicked.
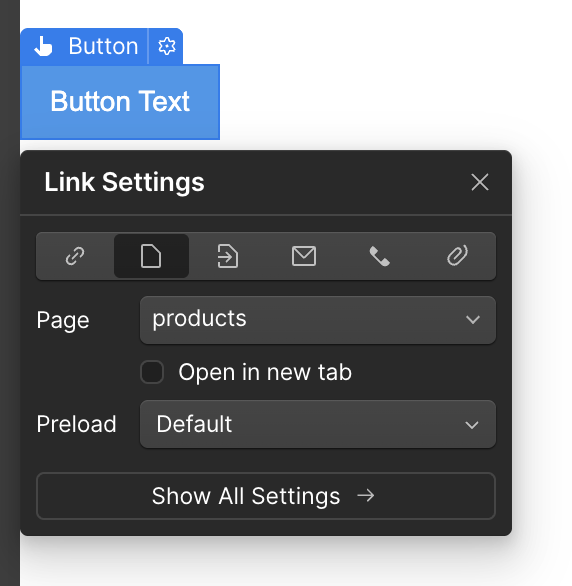
- Select the element: Choose the element from the elements panel in Wized. Ensure that the element has a configured destination URL and has the Wized attribute
- Setting up: In the
settingstab of the right panel, select the add parameter to link configuration. - Choose the parameter: Use the dropdown menu to select the parameter you want to add to the link. Make sure you have created the parameter in the data store first, or you can create it by clicking on the
+icon.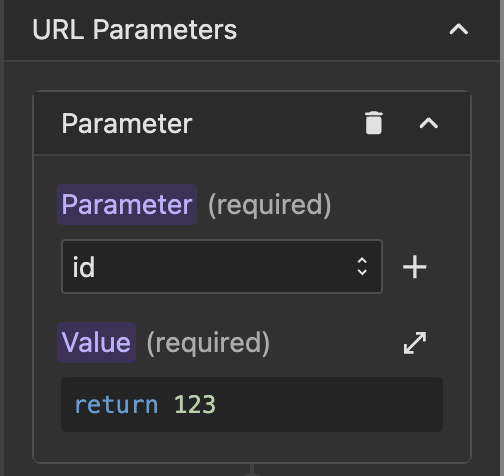
- Define the value in the function editor: In the function editor specify the value you want to assign to the parameter. You can use any available data, such as variables, cookies, API responses, or even the value of other inputs.
When you click the element, the parameter and its value will be automatically added to the destination URL. On the destination page, you can access this value using n.parameters.parameter_name in the function editor.
Note
You can add as many parameters as you want. For each parameter, click on add parameter, and Wized will automatically append all set parameters to the destination URL.
Why use add parameter to link?
- Dynamic detail pages: Pass the ID of a product, item, or other to load specific information about that product on the destination page.
- Filters and searches: Pass search criteria or filters through parameters to display relevant results on the next page.
- Campaign tracking: Add UTM parameters to your links to analyze traffic and performance of your marketing campaigns.
- Personalization: Pass user information or preferences to personalize the content or functionality of the destination page.
Example
Imagine you have a list of products on your website and want to redirect the user to a details page with specific information about that product when they click on it. You can achieve this as follows:
- In Webflow, create a link element in the product card that points to the details page.
- Apply the Add parameter to link setting.
- Select the parameter
productId(make sure you have created it previously in the Data store panel). - In the function editor, write:
// Get the product ID from the rendered list
return r.getProducts.data[v.i].id; // 'v.i' must correspond to the index of the product being clicked// Get the product ID
return r.getProduct.data.id;Now, when clicking on a product, the destination URL will include the productId parameter with the corresponding ID, allowing you to display the correct information on the details page.