Render List
The Render List configuration allows you to dynamically generate lists of elements based on real-time data. Whether pulling information from variables, cookies, request responses, or other sources, Wized ensures that elements are duplicated and displayed according to the number of items in your data set.
Note
Render List does not automatically update the content of each item it only duplicates the selected element. To make each duplicated item display unique data, additional configurations like Text, Visibility must be applied to each child element inside the selected element.
How It works
1. Design the template element
Before using Render List, you must define a template element in Webflow, which will be the base structure for each item in the list. This element can contain text, images, buttons, and other UI components.
Note
Be sure to add the Wized attribute to the template element. Additionally, add the Wized attribute to any child elements you want to have dynamic behavior.
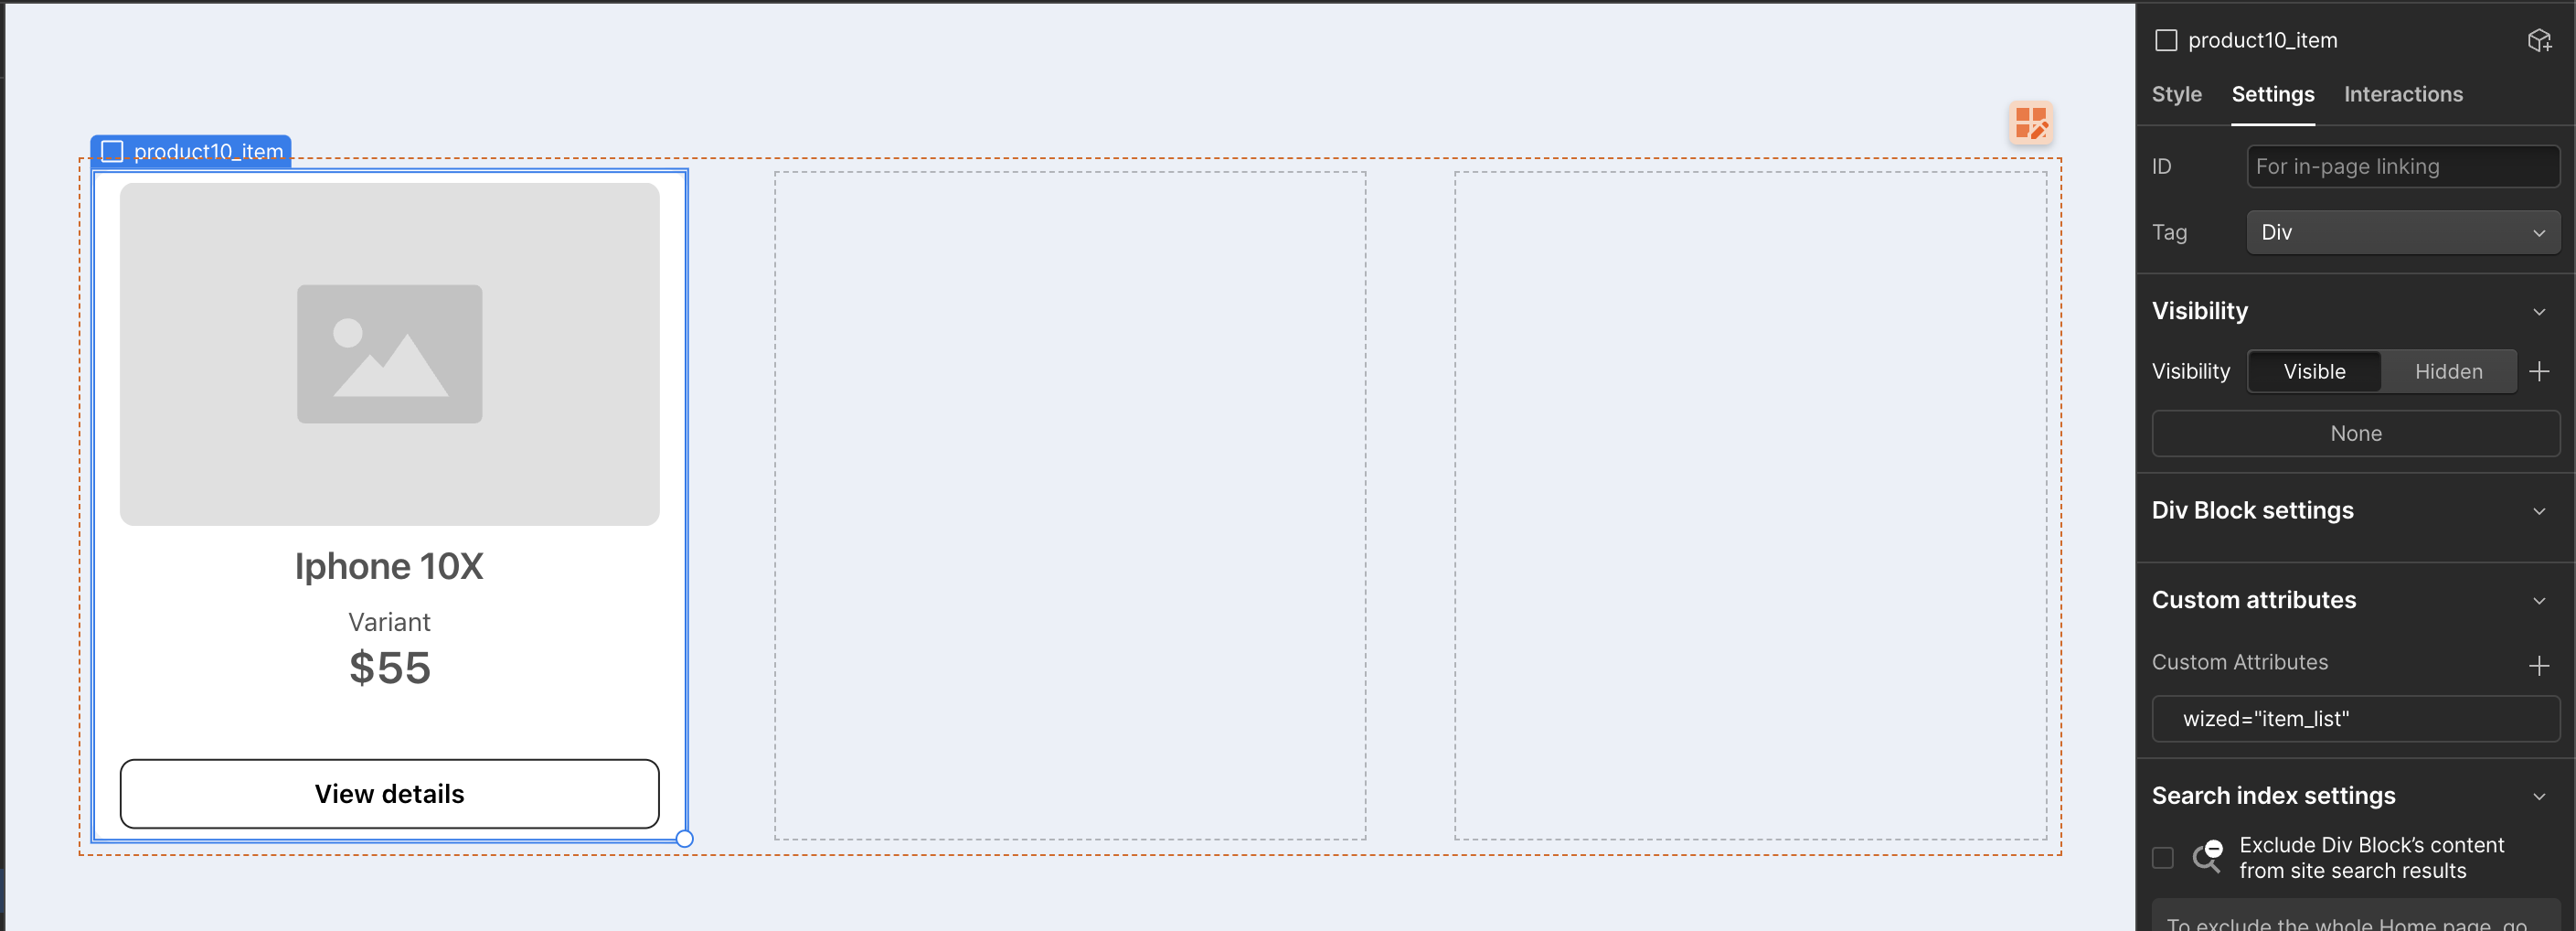
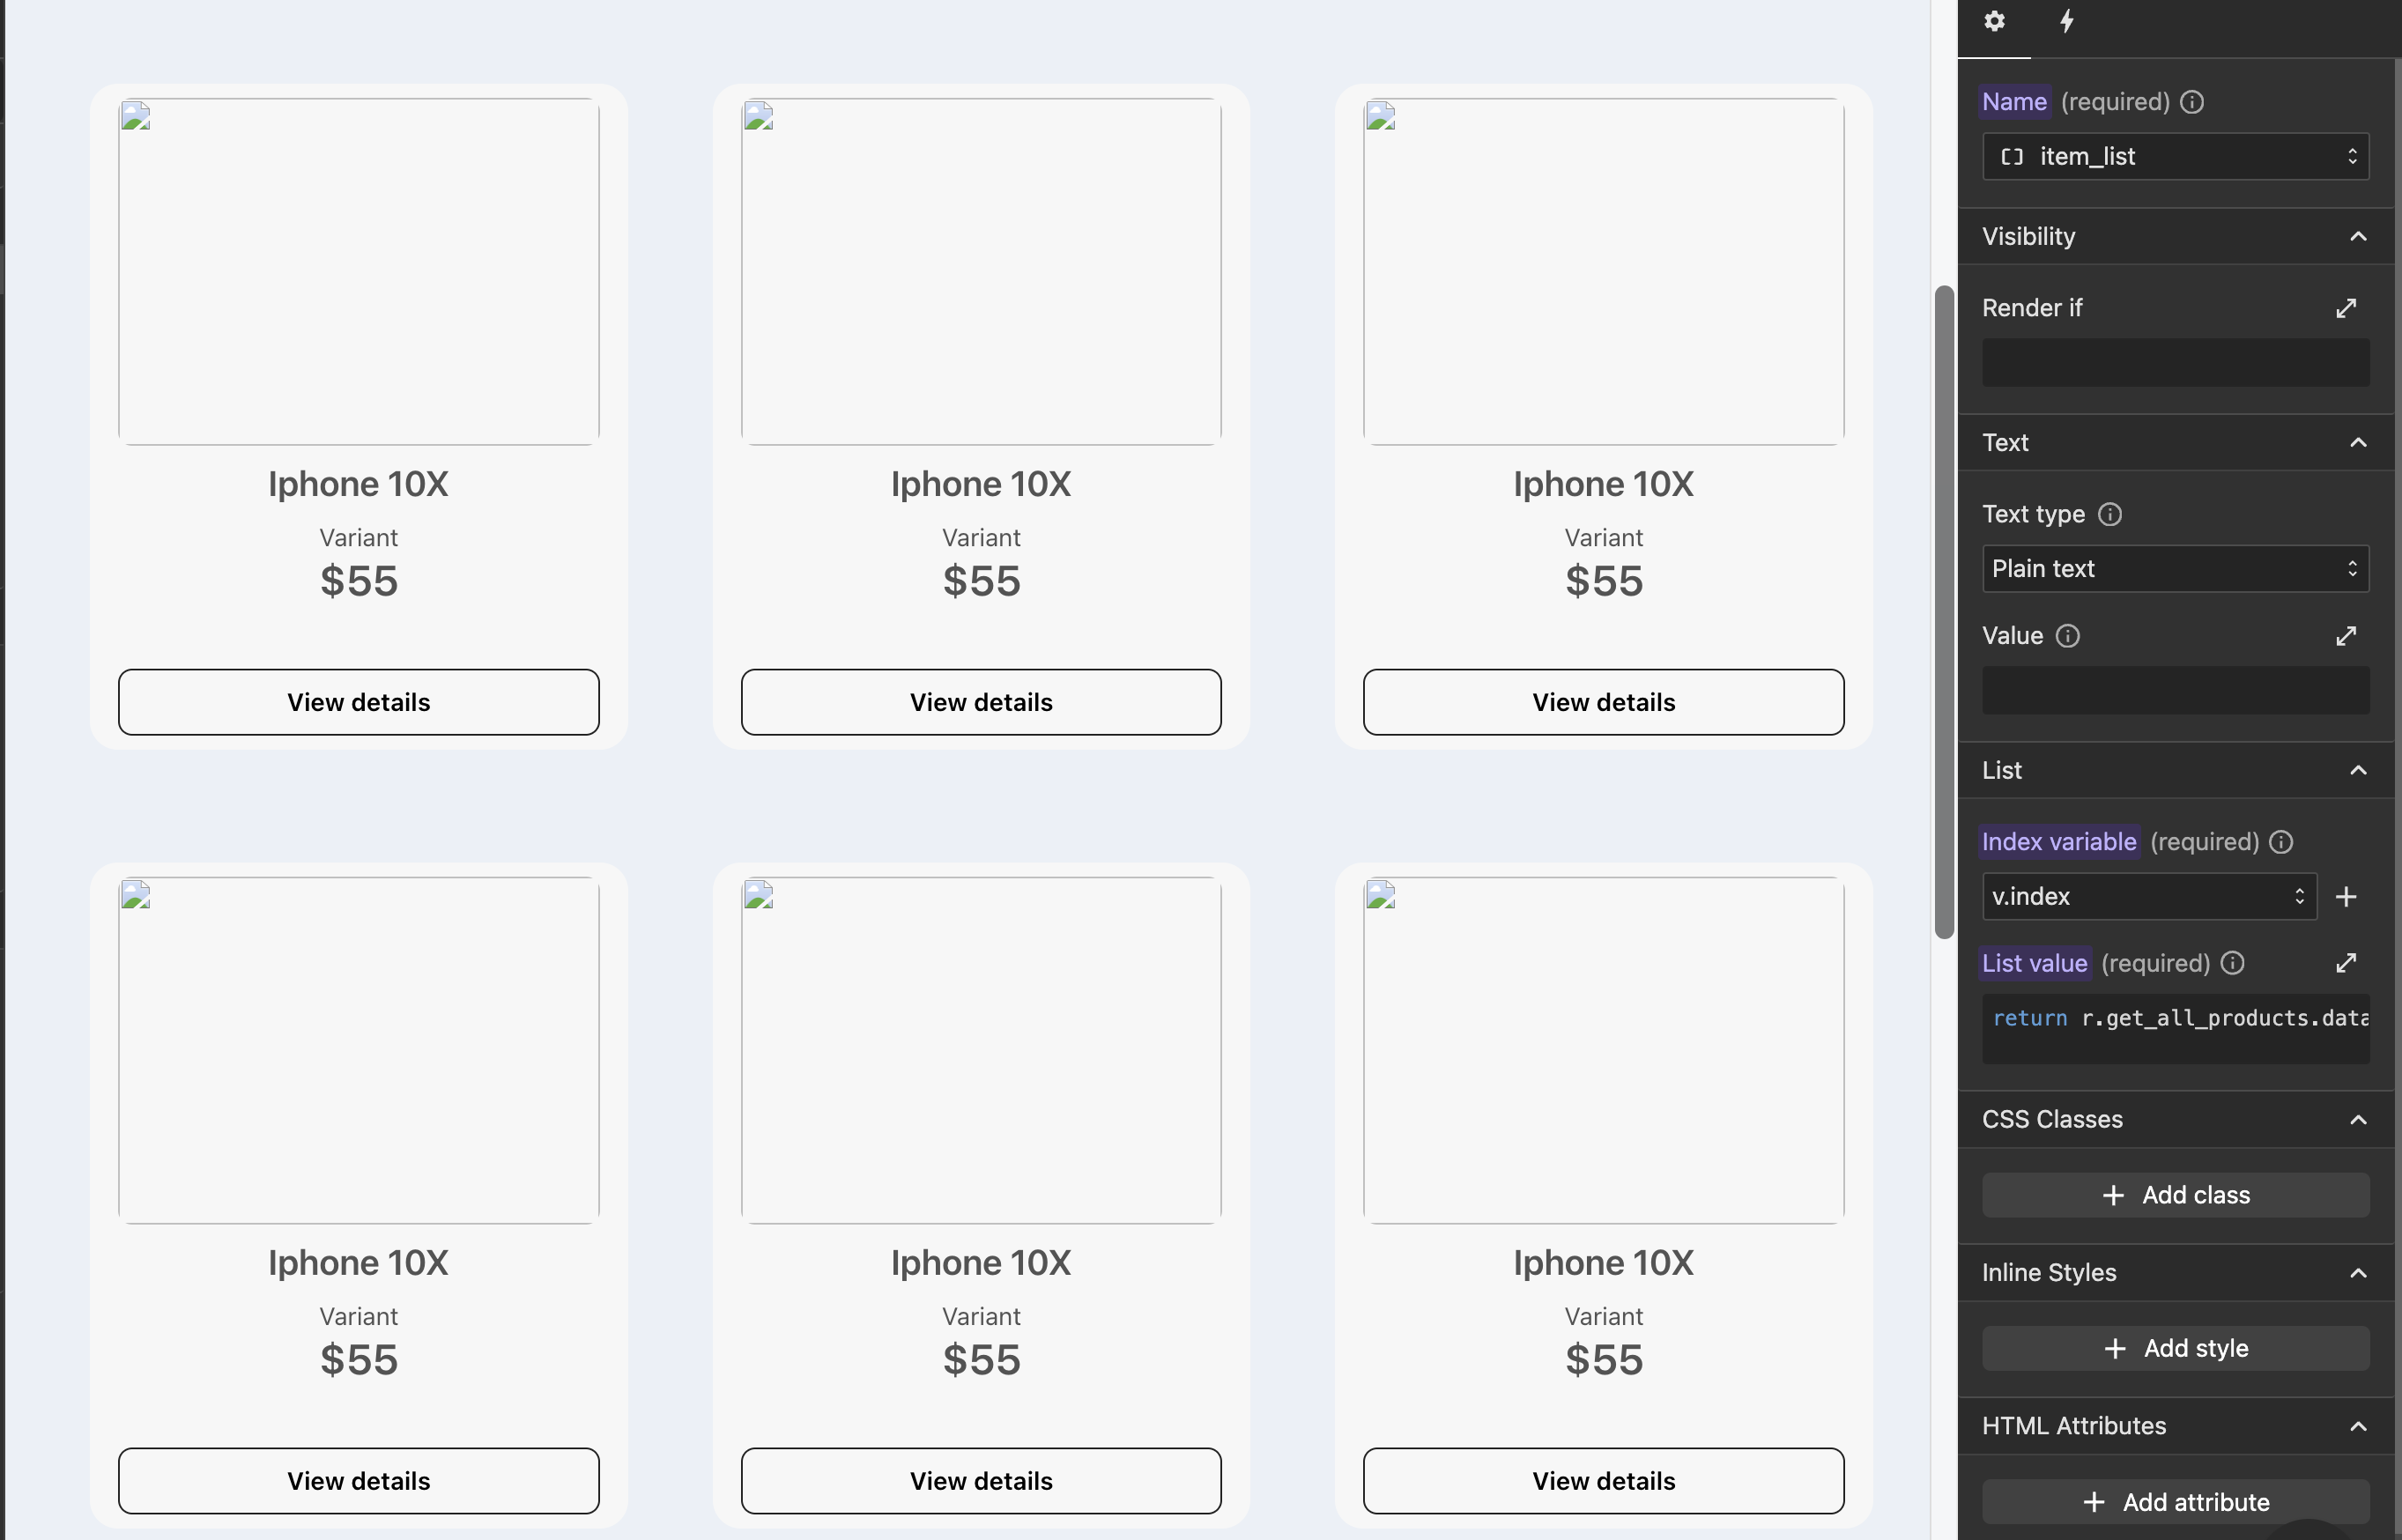
2. Set render list to the element
Once the template element is ready:
- Select the element in Wized's elements panel.
- Define an index variable : (e.g.,
v.i) is required. This variable allows child elements to reference specific data for each item in the list. - List value: Provide an array (list) of data that determines how many copies of the template should be rendered.
Important
If there are several rendering lists on the same page, each must have a different index variable to avoid conflicts.
3. Setting up child elements
Once you select the list you want to render and the index variable, the template element will be duplicated according to the number of items in the list.
Each duplicated element will initially be an exact copy of the original, including text, images, and other content.
To display dynamic information for each element, you need to set configurations each child element to render dynamic data. Follow this steps to personalize each list item:
Ensure child elements have the Wized attribute
- Every child element that should display dynamic data must have a Wized attribute
Verify hierarchy
- Child elements must be direct descendants of the template element in Webflow.
Select the child element in Wized
- Open the elements panel and select the desired child element.
Apply configurations (Text, Visibility, Style, etc.)
- Use Wized configurations like Set Text, Set Visibility, or Set Style to make elements dynamic.
Use the index variable in function editor
- This variable ensures that each duplicated element references the correct data.
Examples:
- Text : To each text element such as titles, descriptions, etc. You must apply a text confituration to render text dynamically for each element.
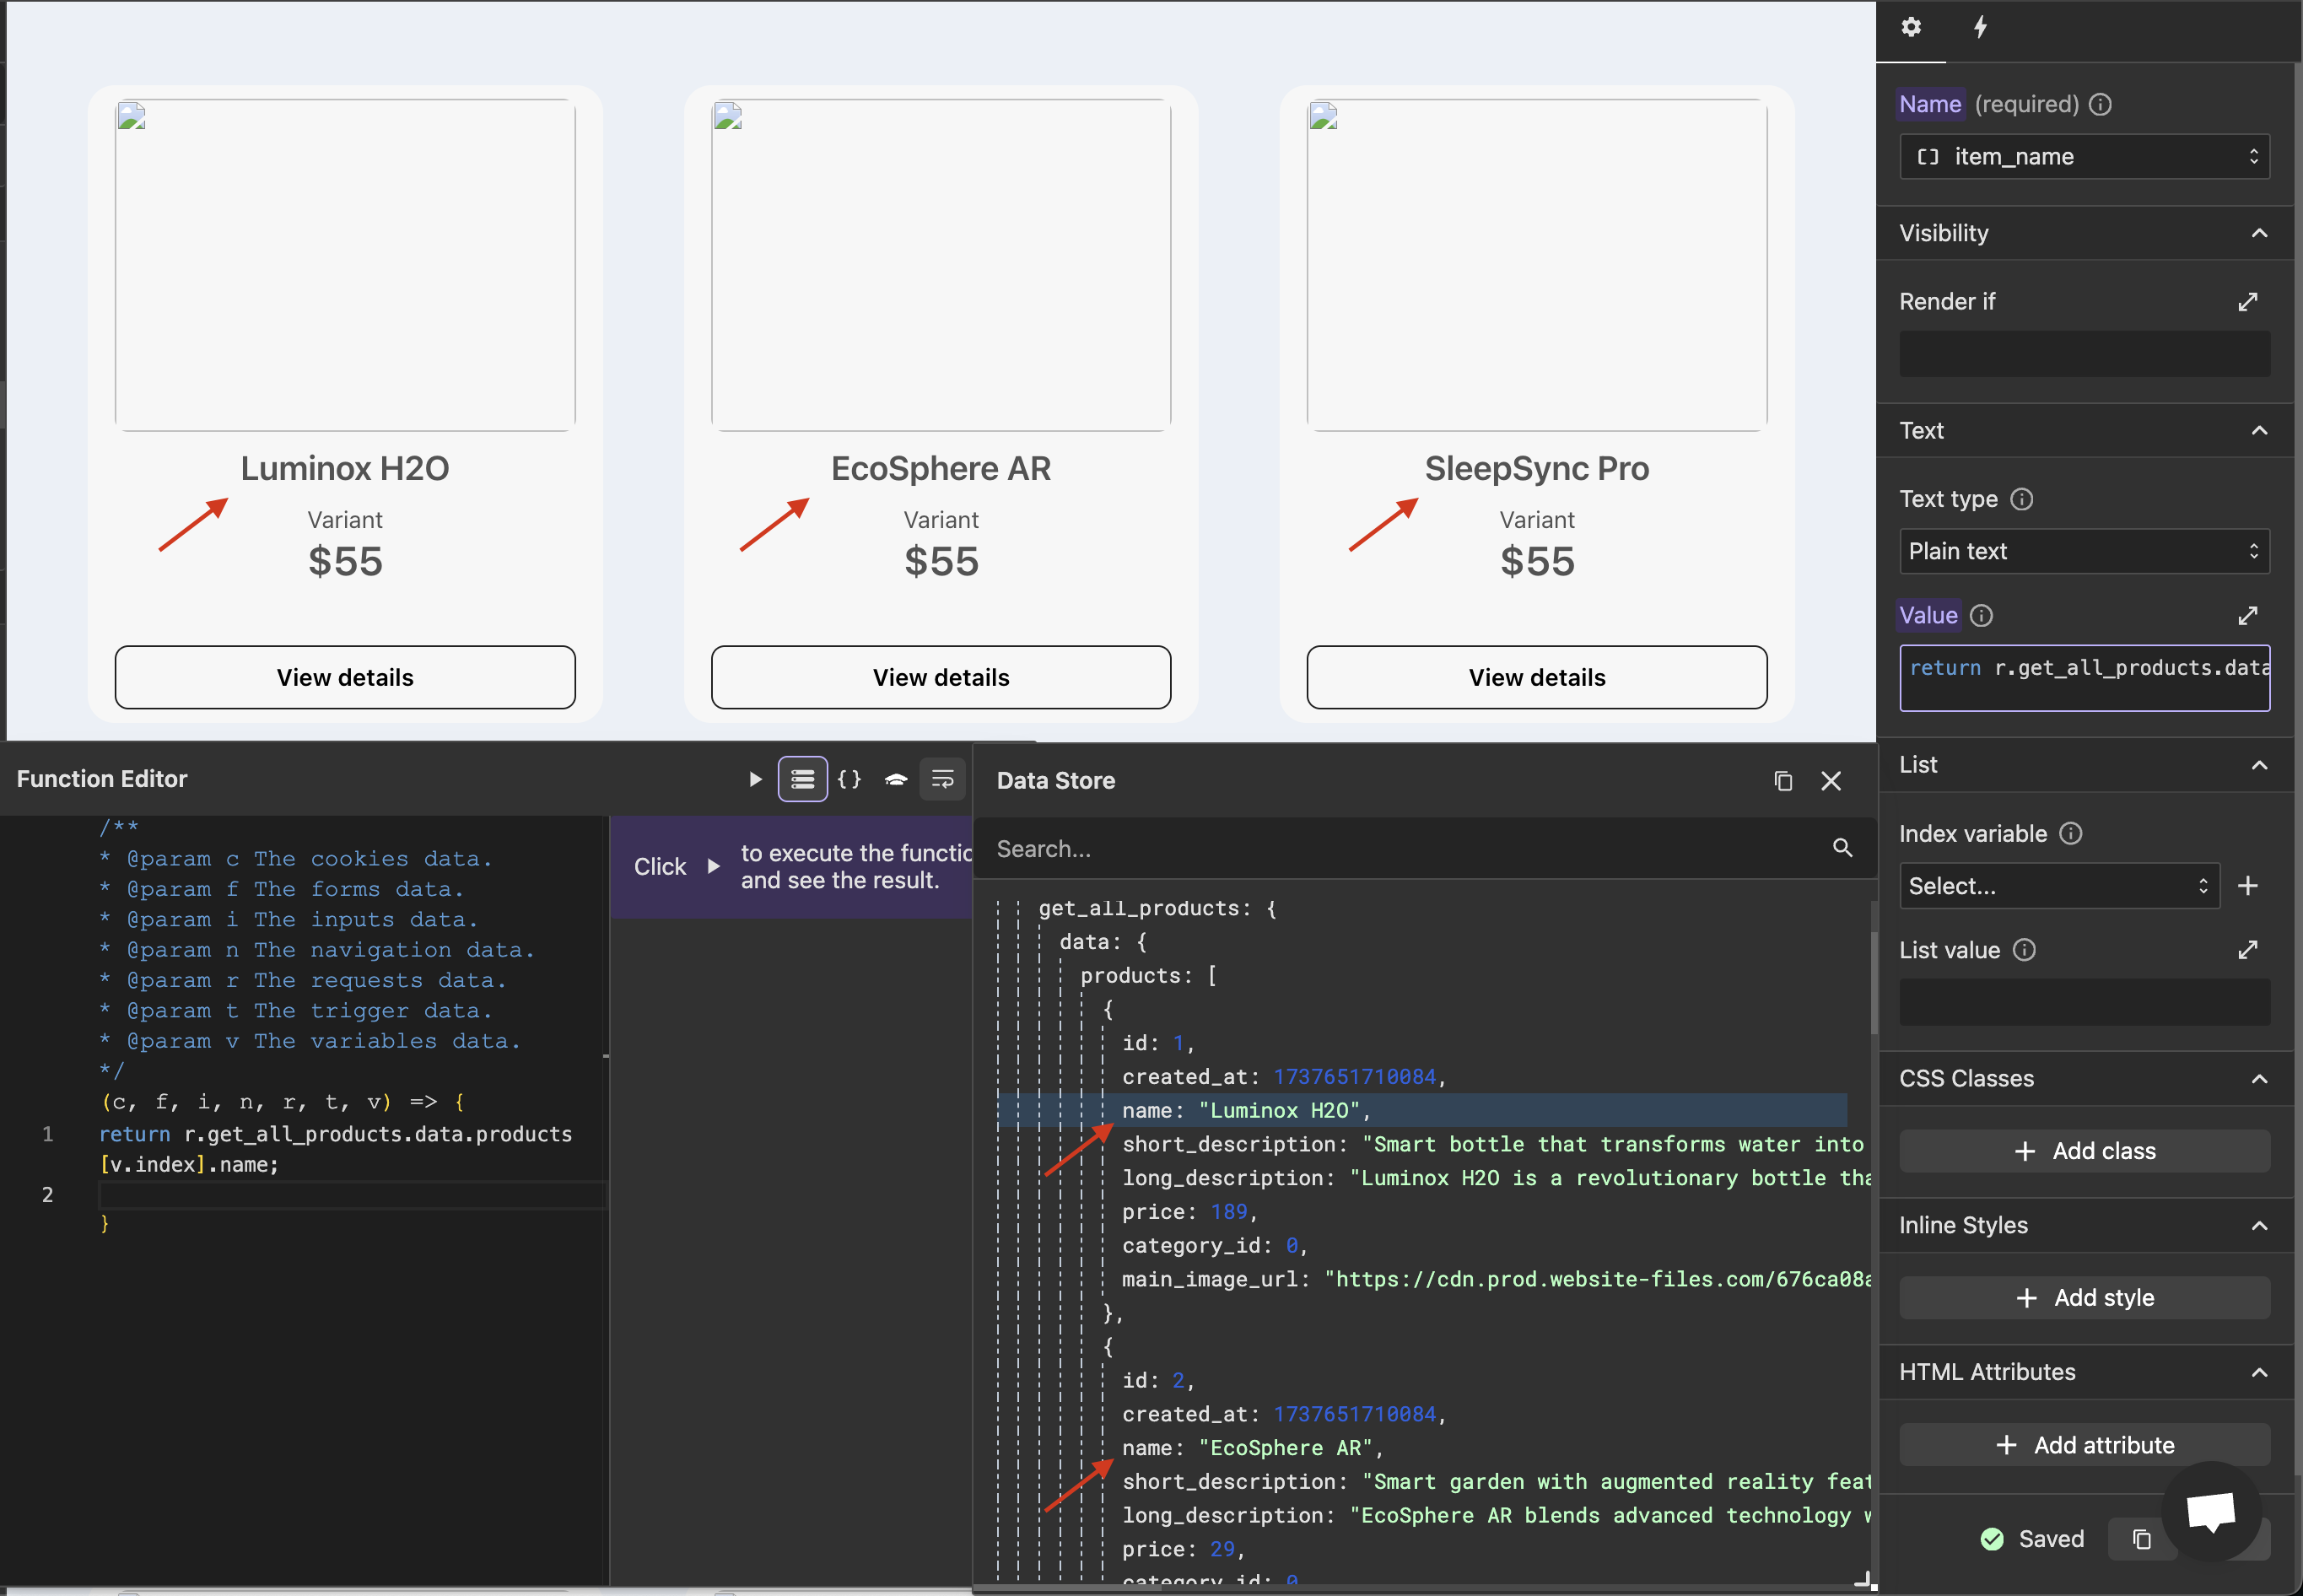
You can use the dot notation to access the desired path, or you can also click on the name of the property you want to use in the data store window, clicking on it will autocomplete the path inside the function editor, just replace the index [0] by the name of the chosen variable.
Example
return r.get_all_products.data.products[v.index].name;
// Assuming that `index` is the name of the variable that was selected as the index variable
Note
Make sure you are using the index variable in the path you are using in the function editor, this will iterate over the list and each element will have its own information.
- Images: To render images dynamically, you must add an HTML attribute to the image element where the
keywill beSRCand the value will be theURLof the image, make sure the URL ends in.png,.jpg, etc.
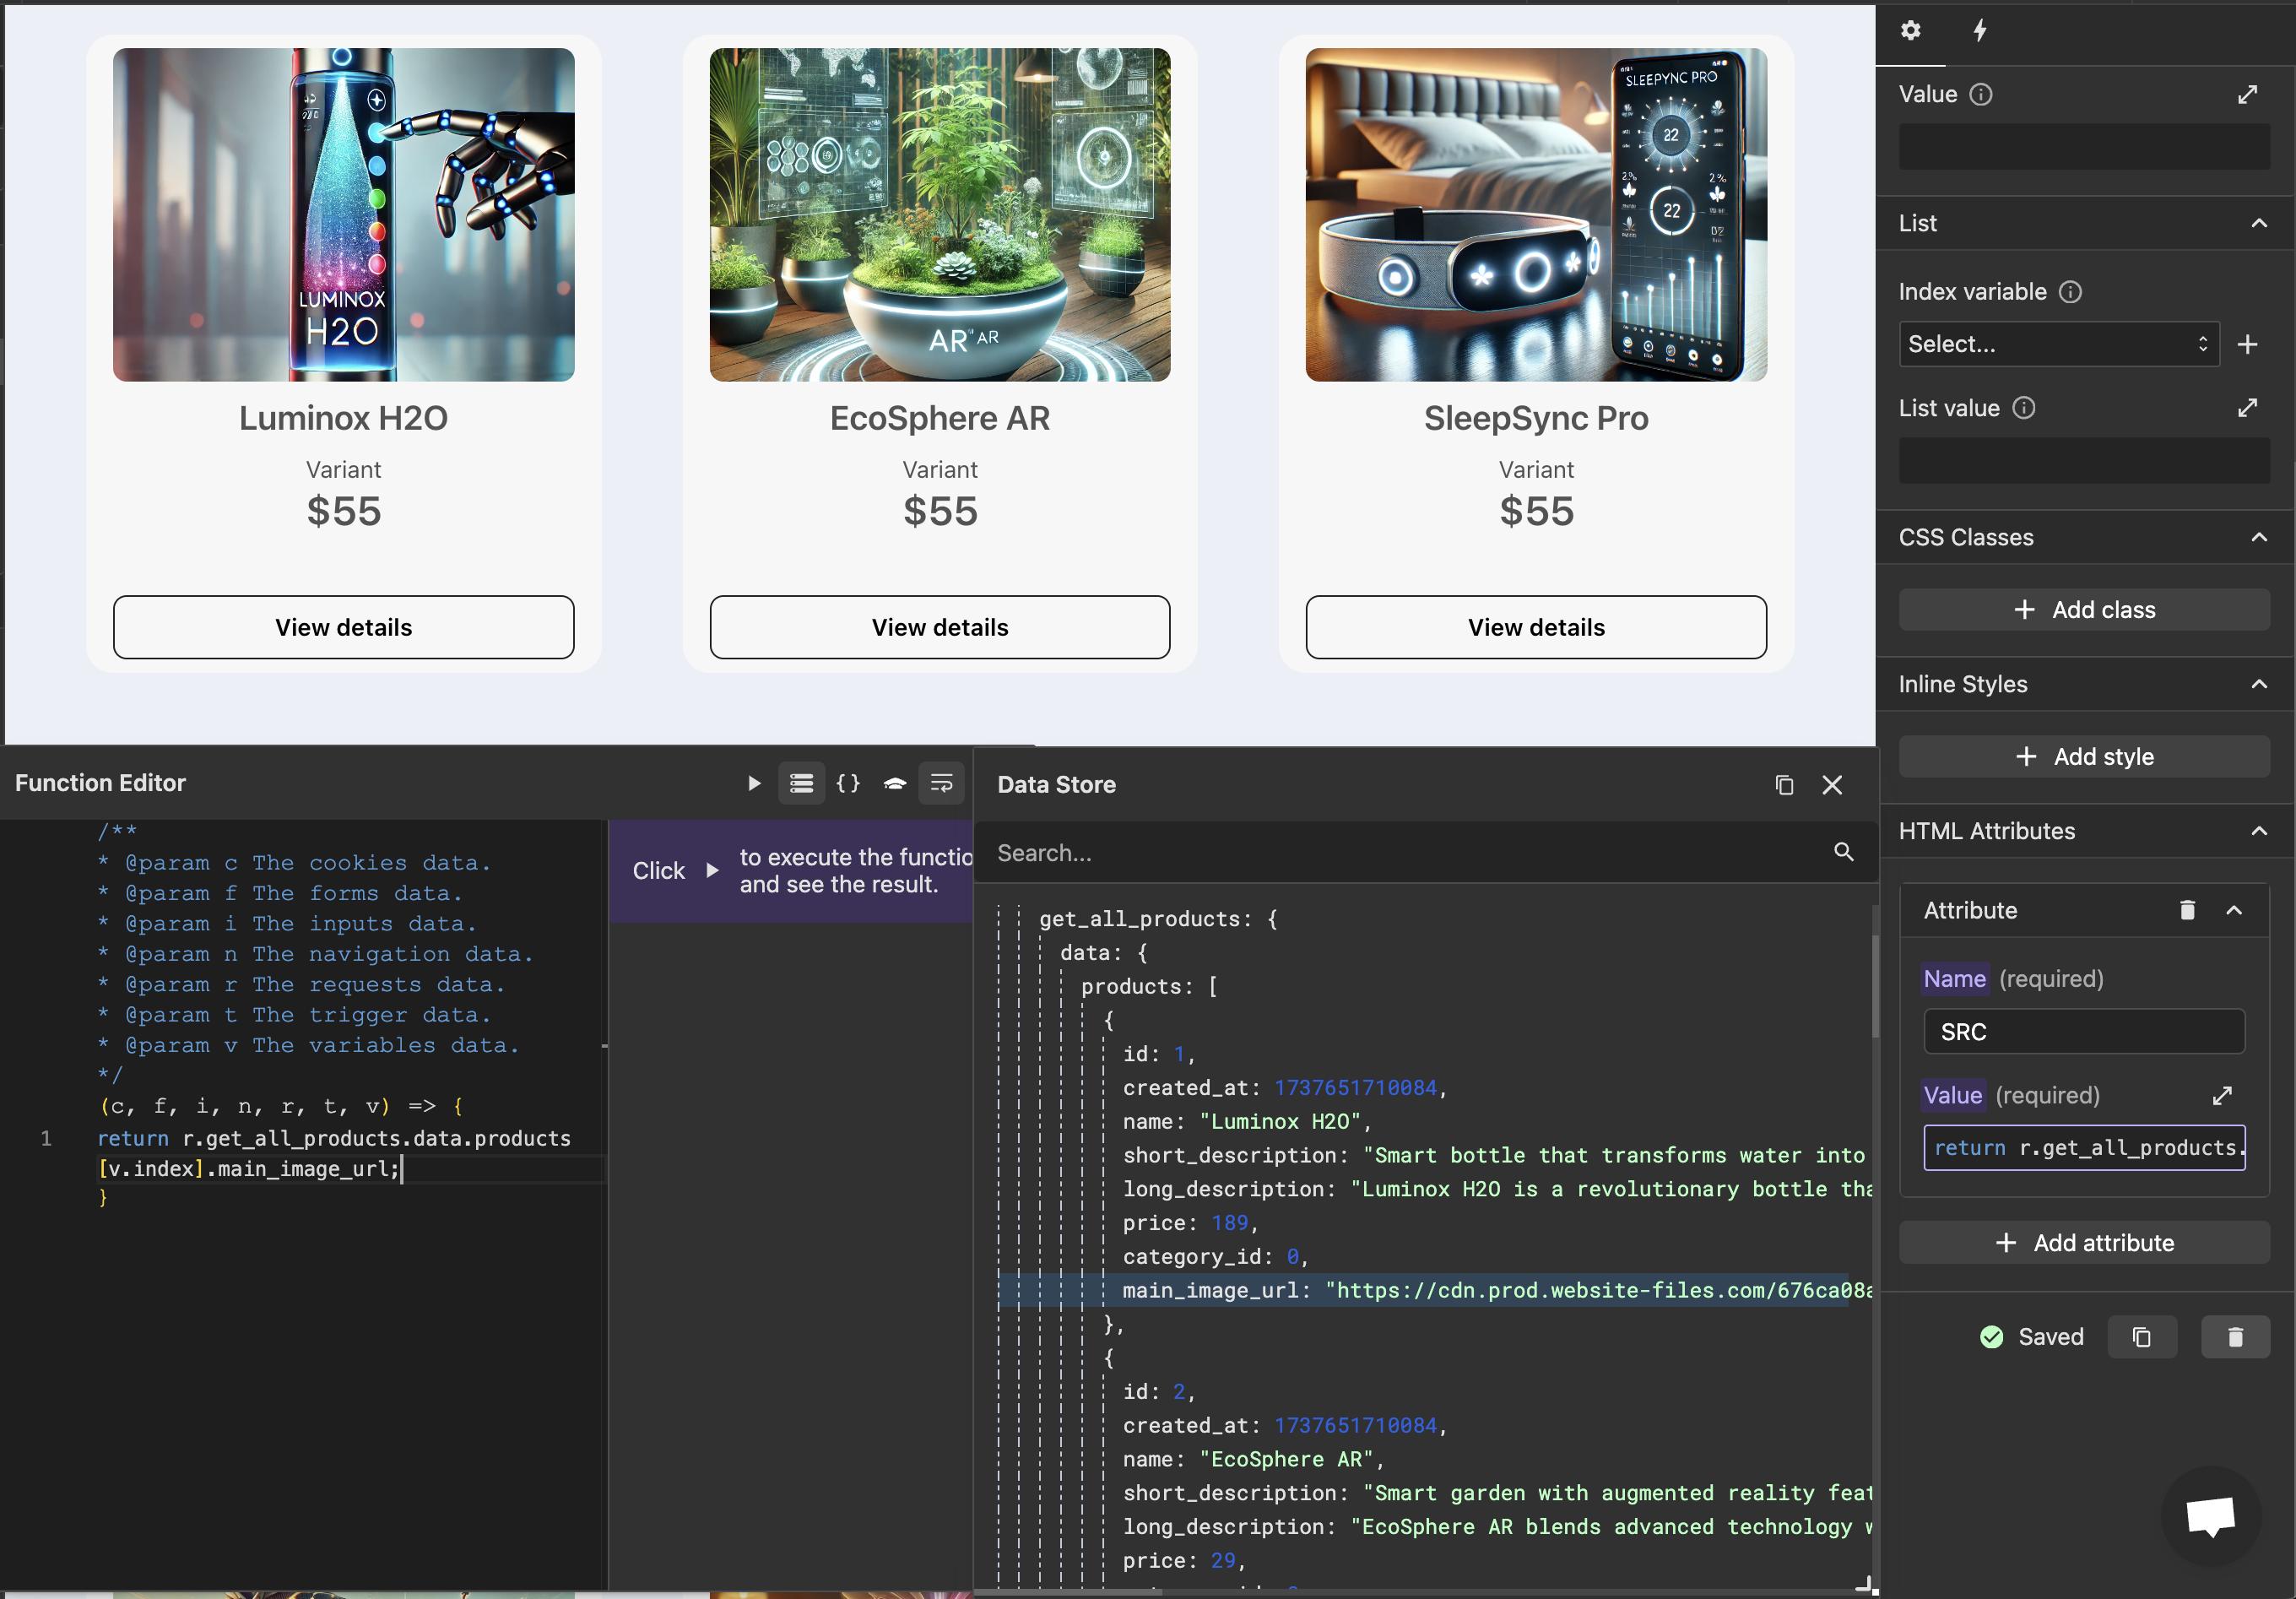
You can use the dot notation to access the desired path, or you can also click on the name of the property you want to use in the data store window, clicking on it will autocomplete the path inside the function editor, just replace the index [0] by the name of the chosen variable.
Example
return return r.get_all_products.data.products[v.index].main_image_url;
// Assuming that `index` is the name of the variable that was selected as the index variable
Note
Make sure you are using the index variable in the path you are using in the function editor, this will iterate over the list and each element will have its own information.
Structuring and styling lists
Wized handles duplication of list items, but layout and styling depend on how the container is structured in Webflow. To ensure proper rendering:
- Use flexible container layouts that adapt to different amounts of content.
- Apply CSS grid or flexbox for better responsiveness.
- Keep the template element simple to avoid unnecessary complexity in duplication.
The importance of the index variable
The index variable (e.g., v.index) allows Wized to iterate over the data and assign a unique value to each duplicated item.
| Item in List | Index Value (v.i) |
|---|---|
| First Item | 0 |
| Second Item | 1 |
| Third Item | 2 |
| ... | ... |
Using v.index, child elements inside the list can reference different data points.
// Example: Only show "Add to Cart" button when stock is available
return r.getProducts.data[v.index].stock > 0;
Note
If v.index is not used, all items will display the same data, preventing dynamic behavior.
Rendering lists inside lists
Wized supports nested lists, allowing you to display lists within lists (e.g., categories and subcategories).
How to render nested lists:
1. Apply render list to the parent element
- Example: A list of product categories (uses
v.ifor indexing).
2. Apply render list to a child element inside the parent
- Example: A list of products within each category (uses
v.jfor indexing).Note
You should not use the same index variable for different lists rendered on the same page.
3. Ensure different index variables for Each Level
v.ifor the parent list (categories).v.jfor the nested list (products inside categories).
// Example: Accessing nested product data
return r.getProducts.data[v.i].categories[v.j].name;
Example structure
[Main List]   -> Categories
  ├── [Item 1] -> "Electronics"
  │      ├── [Sub Item 1] -> "Laptop"
  │      └── [Sub Item 2] -> "Smartphone"
  ├── [Item 2] -> "Clothing"
  │      ├── [Sub Item 1] -> "T-shirt"
  │      ├── [Sub Item 2] -> "Jeans"
Practical examples
Display product name in each list item
return r.getProducts.data[v.i].name;Show "Add to cart" button only when stock is available
return r.getProducts.data[v.i].stock > 0;Show index number for each item
return v.i + 1;
// Displays item number starting from 1 instead of 0