Integration
Prerequisites
Before you begin, make sure you have:
- A live website
- A Wized account
- Access to your website's HTML files or hosting control panel to add custom code
Creating a Wized Project
From the Wized dashboard, click New Project in the top right corner.
Paste the domain of your custom site.
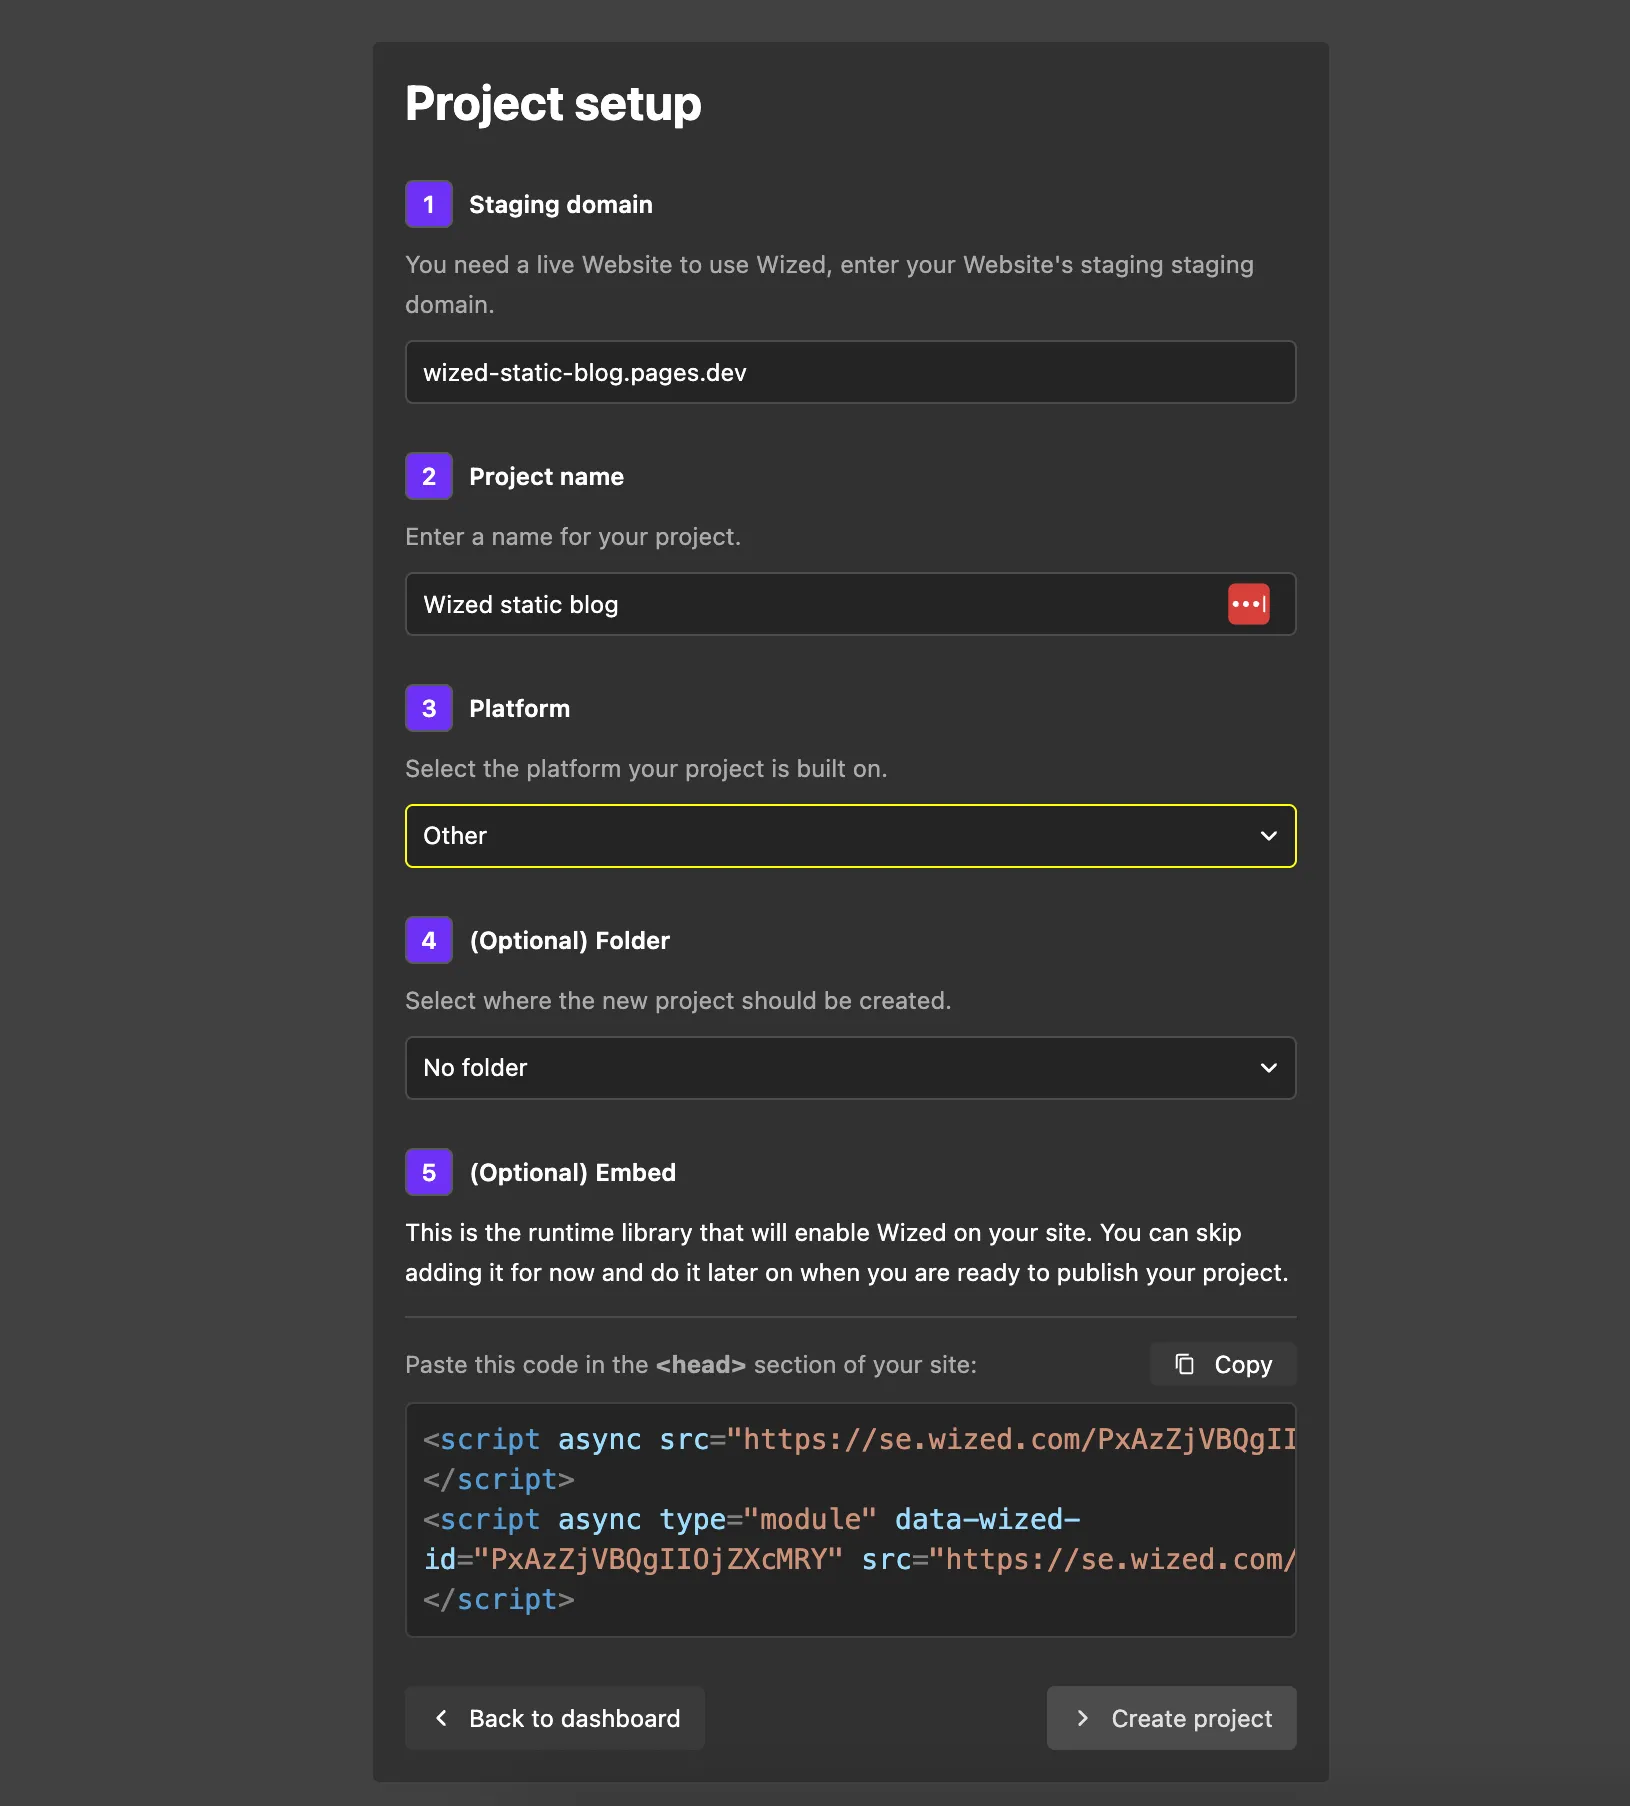
The name and platform will be automatically detected. You can change the name if needed. If needed, select Other as the platform.
Copy the generated code at the bottom. This will be the Wized integration script you need to add to your website. This step is optional for testing and can be done later.
Adding Wized to Your Custom Site
You have two options for integrating Wized into your custom site:
Option 1: Add to Global Website Head (Recommended)
This ensures Wized is available across all pages of your website without needing to add the script to each page individually.
For website-wide Wized functionality, add the script to the <head> section of your site's main HTML file or master template:
- Open your website's main HTML file or template.
- Locate the
<head>section. - Paste the Wized script before the closing
</head>tag. - Save your changes and deploy.
This makes Wized available across all pages of your website.
Option 2: Add to Specific Pages
For page-specific Wized functionality, add the script only to the pages where you need it:
- Open the HTML file for the specific page.
- Locate the
<head>section (or just before the closing</body>tag). - Paste the Wized script.
- Save your changes and deploy.
This approach is useful if you only want Wized functionality on certain pages of your site.
Testing Your Integration
After adding the Wized script, visit your website and open the browser console (F12 or right-click → Inspect). You should see Wized initialize without any errors. You can now start building your dynamic functionality using Wized.