Workflow Nodes
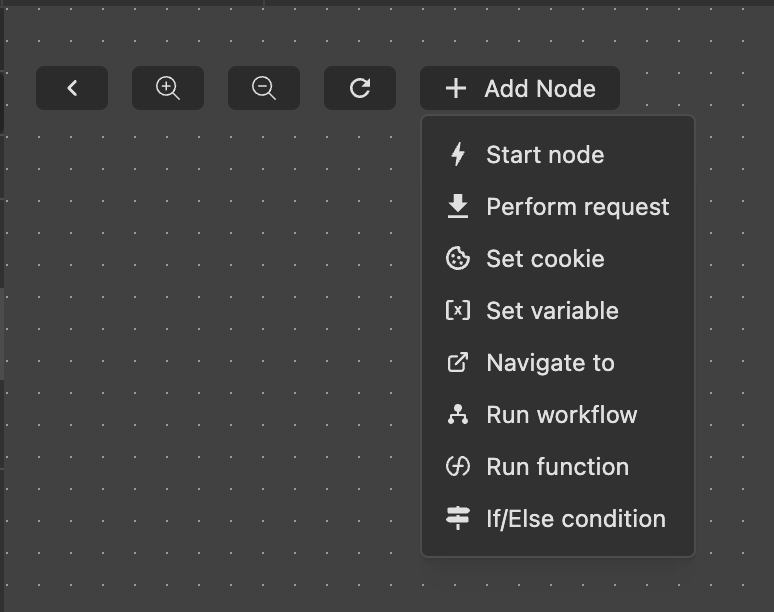
Workflow nodes represent actions or conditions and can include the following types:
- Perform Request: Make an HTTP request to an external API.
- Run Function: Run a custom function.
- Set Variable: Set a value for a variable.
- Set Cookie: Save a value in a browser cookie.
- Navigate To: Redirect to a specific URL or page.
- Run Workflow: Initiate another workflow.
- If/Else Condition: Add conditional logic to manage the workflow's execution.
Creating a Workflow Node
You can create a workflow node by:
Creating and linking it directly to an ending node:

Creating a node from the top bar:
If a node is selected, the new node will be linked to the selected node. If no node is selected, the new node will be created as an unlinked node.
Selecting a Node and Configuring Node Settings
To configure a node, first select it. The settings for the selected node will appear on the right panel:
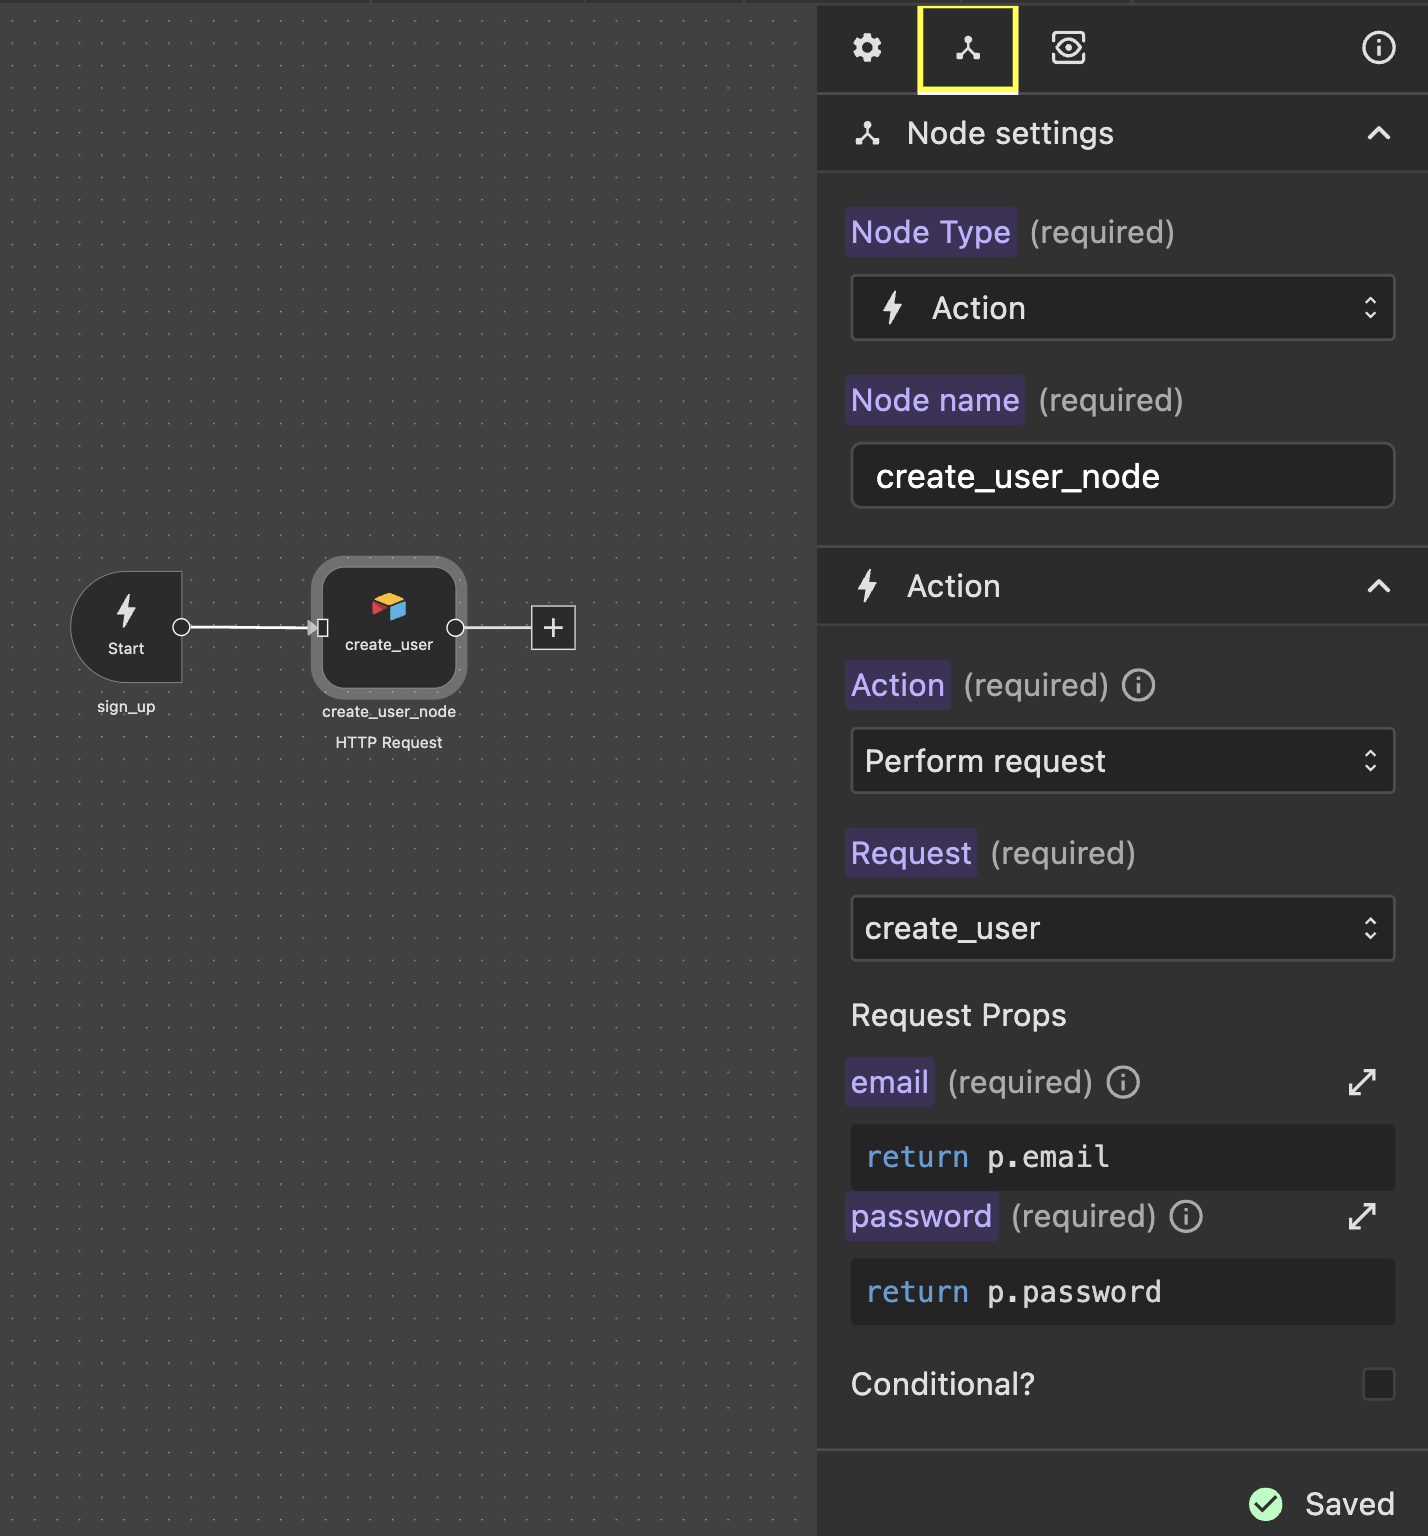
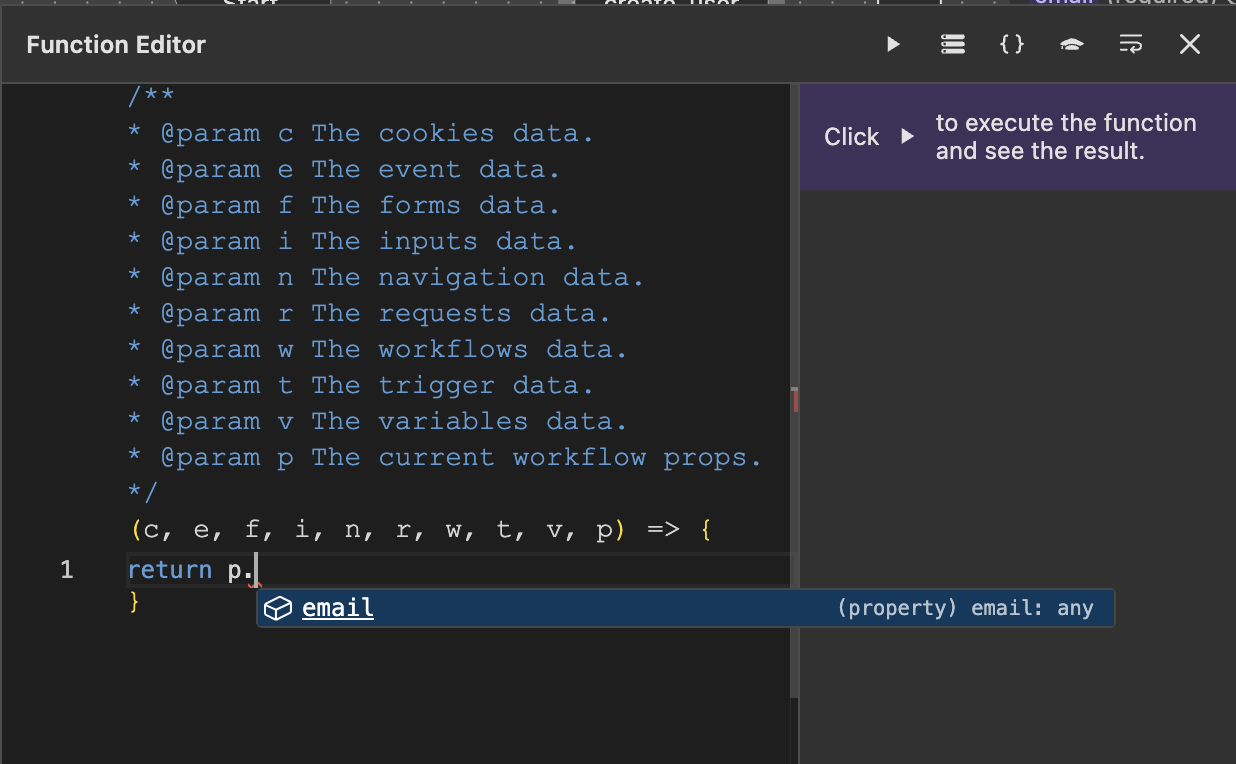
Passing Props from Workflow to Node Settings
In the Workflow Node settings, you can access the email prop using the variable p, as illustrated below:
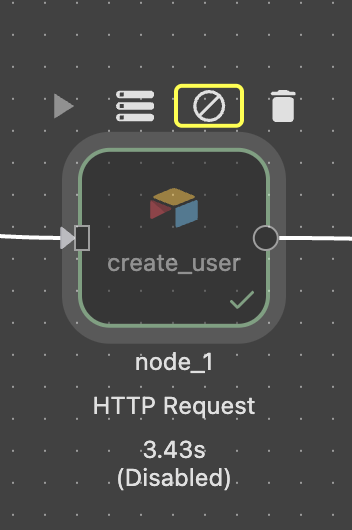
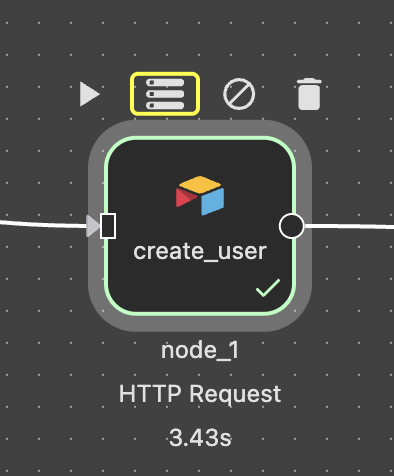
Node Top Bar Buttons
When you hover over a node, the top bar buttons will appear: 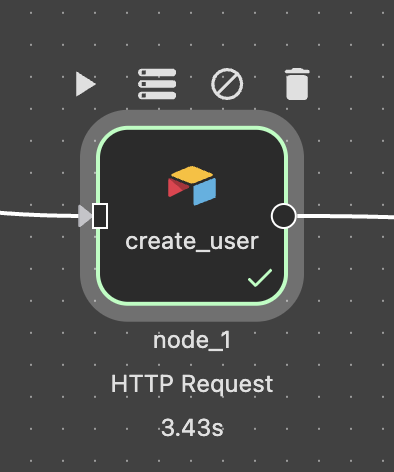
These buttons include:
- Play Button: Run the workflow from the beginning up to the selected node.
- Disable Button: Temporarily disable a node, causing the workflow to skip it during execution.
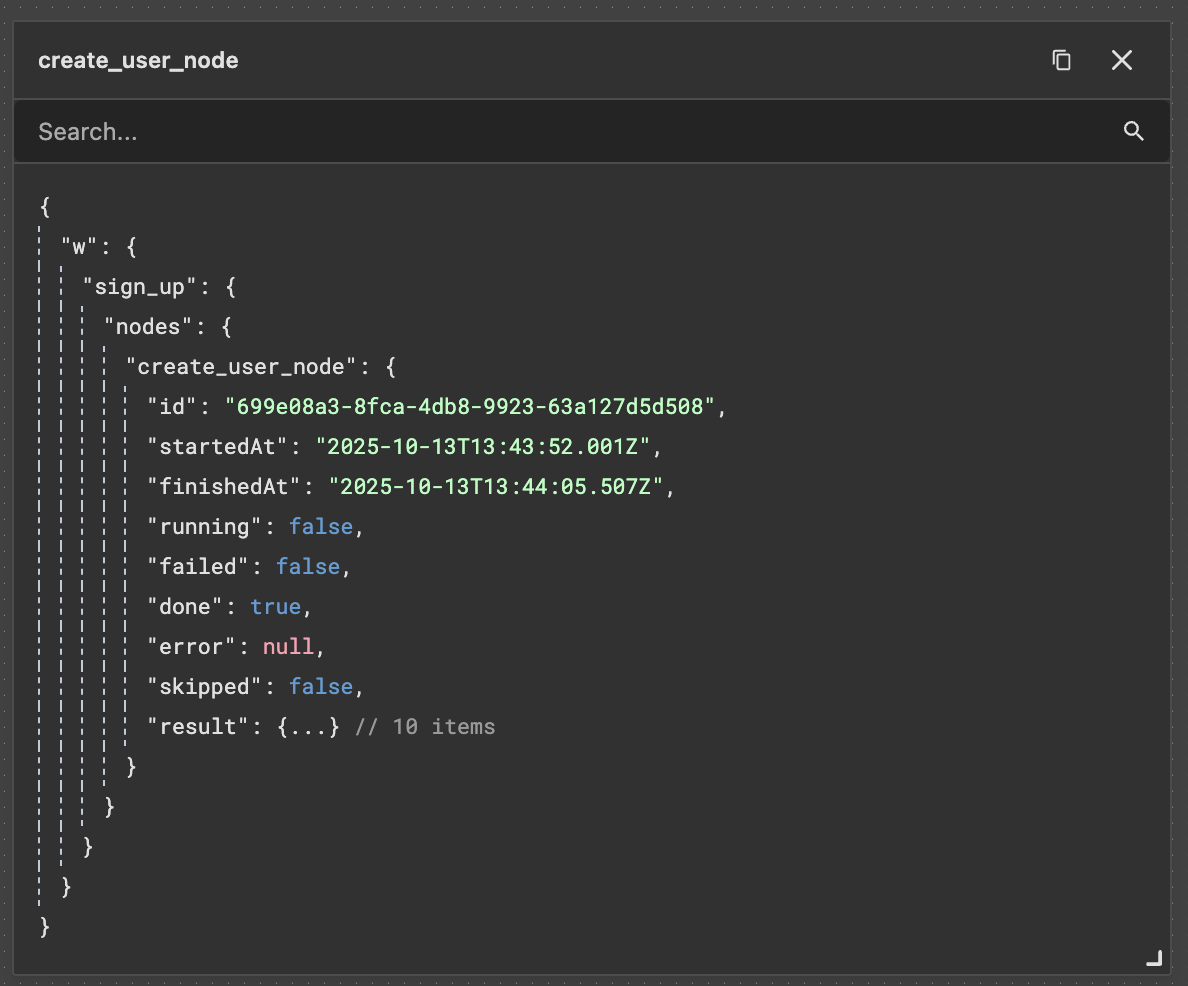
- Data Store Button: Open the execution data for the node.
- Delete Node Button: Delete the selected node