Adding Wized Attributes in WordPress
Wized attributes are essential for identifying and configuring elements on your WordPress website. Unlike Webflow where you can add custom attributes directly in the designer, WordPress requires different approaches depending on your setup.
Understanding Wized Attributes
Wized uses custom HTML attributes to identify elements that should be managed by the configurator. The main attributes are:
| Attribute | Purpose |
|---|---|
wized | Main attribute to identify interactive elements |
wized-cloak | Prevents content flash during page load |
wized-loader | Identifies loader elements |
Adding Attributes in Page Builders
Elementor
- Select the element you want to add attributes to
- Go to Advanced tab
- Scroll to Attributes section
- Add your Wized attribute:
wized|your-element-name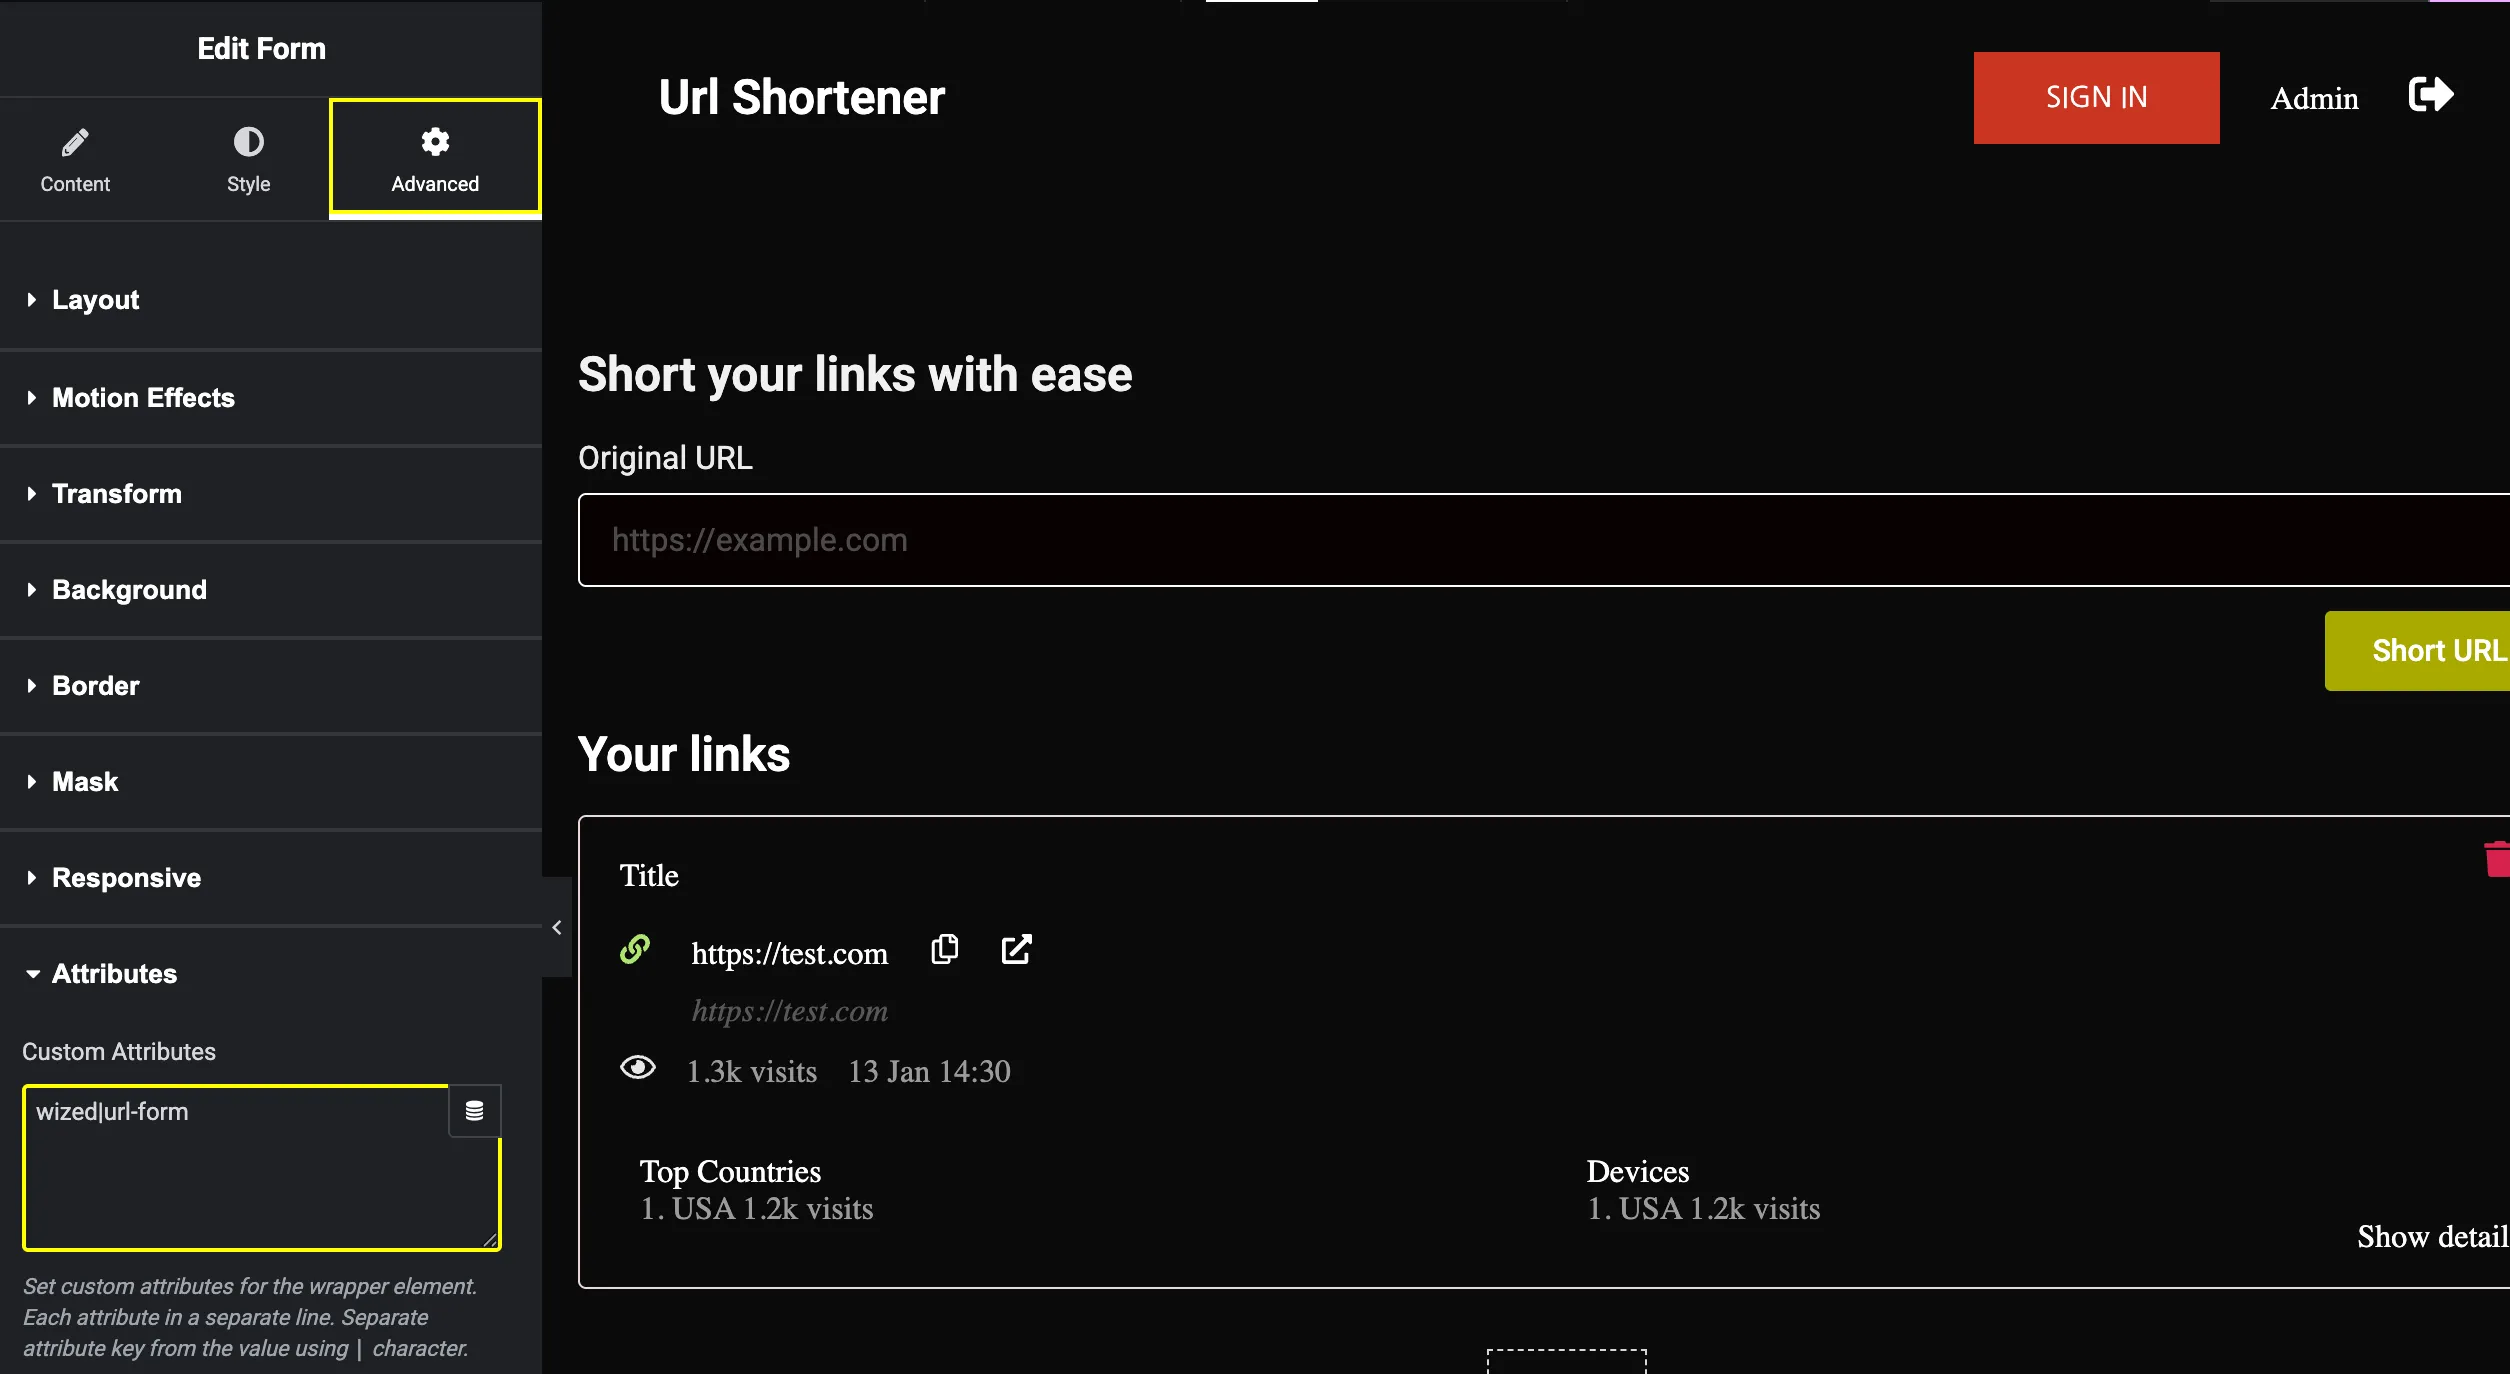
TIP
In Elementor, attributes are added in key|value format separated by a pipe character.
Best Practices
Use descriptive names - Choose clear, unique names for your Wized attributes that describe the element's purpose
Avoid conflicts - Ensure attribute values are unique across your entire site
Keep it organized - Use a consistent naming convention (e.g.,
page-section-element)Document your elements - Keep a list of all Wized-enabled elements and their purposes
Test thoroughly - After adding attributes, verify they appear correctly in the Wized configurator
Learn More
To learn more about attributes, check our Wized Attribute documentation.